
[ad_1]
Instagram launched an official app for Windows 10 last month, but it’s missing one key function: there’s no way to upload photos. There’s no way to upload photos from the website either, and there’s no dedicated app for Mac OS X.
This is a pain – particularly if you want to share pictures you’ve taken with a digital camera rather than a smartphone, or you want to make a few sneaky edits using a photo editor first.
Instagram might change this in the future, but in the meantime there are two handy ways to get around it and upload photos from your PC or Mac.

The BlueStacks method
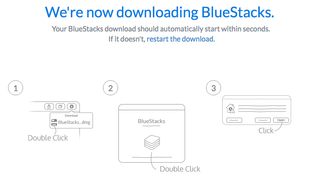
1. Get BlueStacks App Player
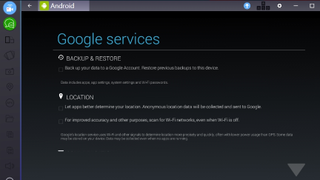
The Instagram app for Android is superb, and you can run it on your desktop using free Android emulator BlueStacks App Player. Download and install BlueStacks (for PC or Mac), then open it and select the right language. You don’t need to worry about location accuracy since you’re not out and about, so feel free to dismiss this option when it appears.

2. Log in and set it up
Click ‘Continue’ at the bottom left, then log in using your Google account. Review the terms of service and, if you agree, click ‘OK’. The next checkboxes are completely optional; if you’re only using BlueStacks to upload to Instagram, feel free to uncheck them all. Click the ‘Next’ arrow, then enter your name.
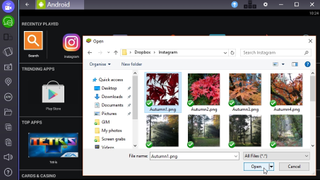
3. Upload a photo
Select the folder icon from the menu on the left (Copy files from Windows) and select the photo from your PC. Under ‘Complete action using’, select Instagram and log in using your usual details. The Instagram mobile app will load on your desktop just like it would on a phone.
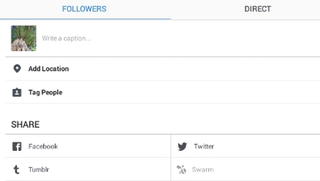
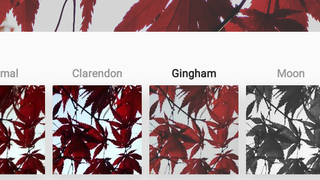
4. Filter and share
You can now crop your photo to a square and apply a filter. Once you’re done, click ‘Next’, enter a caption and choose where to share your photo to. Click ‘Share’ and it will be added to your photostream for the world to see. BlueStacks can sometimes be a little slow, so be patient if it seems to have frozen.
The Dropbox method
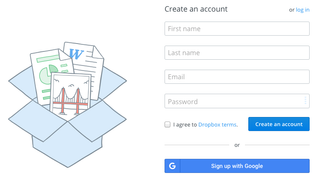
1. Install Dropbox
Another way to circumvent Instagram’s desktop-blocking is to use cloud storage service Dropbox. First, create a Dropbox account, then download and install the Dropbox client software for your PC or Mac. Install the Dropbox app for Android or iOS on your phone and log in.
2. Upload and sync photos
Drag a photo from your PC or Mac into your new Dropbox folder and it will be synced with the mobile app automatically. Grab your phone, open the Dropbox app and tap your photo to select it. Tap the downward-pointing arrow in the top right. Select ‘Export’, then choose the Instagram app.
3. Filter and share
The Instagram app will open as normal on your phone, and you can apply filters and share your picture as usual.
To make sure your pictures look great before sharing them on Instagram, check out our tutorial on retouching portraits using free photo editor Paint.NET, and take a look at our roundup of the best free photo editors.
[ad_2]
Source link